Overview
This article provides information about the content found within the PointSolutions Application. PointSolutions has three primary tabs: Polling, Content, and Manage. This article aims to provide some basic instructions for using the three primary polling features found within PointSolutions: PowerPoint Polling, Anywhere Polling, and Self-Paced Polling. To see detailed Echo360 articles about Polling, visit: Polling – Support
Using the Desktop Application
- Open PointSolutions in Windows or Mac
- Click Sign In and sign in with your NEOMED email account.
- Once logged in, you should see the PointSolutions dashboard (pictured below).

The Polling dashboard is split into a few sections.
- Section One: These are the dashboard tabs this is where you will find the information for each section. Polling is where you deal with polling setup, Content is where you deal with content, and Manage is where you deal with managing grades or uploading them to Canvas.
- Section Two: Where you see your synced courses and you can select the Course before opening a polling option.
- Section Three: Where you can change the receiver number that the clickers will connect to.
- Please note, each lecture space at NEOMED has been assigned a dedicated channel to avoid interference. Please avoid changing this.
- Section Four: Where you enable mobile responses (this is how the students will connect their phones or laptops to the polling)
- Section Five: Where you select which polling option you would like to use, which are described in the "Polling Options" section below.
- Section Six: Where you see content that you made in the content tab. (*To create content such as question and participant lists, see: PointSolutions: Creating Question Lists in PointSolutions Desktop – Support)
- Section Seven: Where you see your current version or check for updates. For more information on how to update your version of PointSolutions, please refer to the Article - How to Update PointSolutions
Polling Options
PowerPoint Polling
PowerPoint Polling allows participants to answer polling questions during your PowerPoint presentations. Use the PowerPoint PointSolutions Slide Show functionality to run the polling presentation. To poll in PowerPoint, a presentation with polling slides or a question list is required. To track results based on participants, a participant list is also required.
If using PowerPoint Polling in a lecture space, you can either bring your PowerPoint via USB flash drive, or download to the lectern PC via your NEOMED email or OneDrive account.
- Plug in the receiver and / or establish a PointSolutions mobile response session.
- Optionally, select a participant list and / or a question list from under Content.
- Click Start now under PowerPoint Polling.
- The PointSolutions Dashboard closes and PowerPoint opens. If using a question list, PointSolutions will automatically parse the content into polling slides. This may take a few moments if there are a large number of questions in the question list.
- Open the PowerPoint presentation that contains the question slides if a question list has not been chosen.
- Start the Slide Show, then click Reset from the PointSolutions toolbar and select Session before running the slide show.
- Advance the slide to open / close polling depending on the Polling Options selected during content creation.
- Press the spacebar, enter / return key or down arrow to advance the slide. If using a mouse, a mouse click also advances the slide. Alternatively, a PresenterCard may be used to advance slides and control polling.
- Continue until the Slide Show is finished.
- Close PowerPoint.
- Optionally, save your presentation if you made any changes. (PointSolutions opens to the Session Overview on the Manage tab for the session you just ran.)
Anywhere Polling
Anywhere Polling allows for impromptu polling on top of any application.
- Plug in the receiver and / or establish a PointSolutions mobile response session.
- Optionally, select a participant list.
- Click Start now under Anywhere Polling.
- The PointSolutions Dashboard closes and Anywhere Polling opens. If using a question list, it will be visible on the Anywhere showbar.

- Click Open Polling.
- Participants may now respond to the question. To zoom in or out of the Anywhere presentation window, right-click on the presentation window background and select Zoom In or Zoom Out.
- Click Close Polling once all responses are received. The chart window displays if Show Results is enabled for the question.
- Repeat steps 5 and 6 for the remaining questions.
- When finished, close Anywhere Polling. The Anywhere Polling application closes and the PointSolutions Dashboard opens to the Session Overview for the session you just ran.
Self-Paced Polling
Self-Paced Polling allows participants to take a test, in real-time, at their own pace.
- Plug in the receiver and / or establish a PointSolutions mobile response session.
- Select a participant list from under Courses.
- Select a question list from under Content.
- Click Start now under Self-Paced Polling. The PointSolutions Dashboard closes and the Self-Paced Polling window opens.
- Click Accept Sign In. The Session Settings window opens.
- Select a login option from the Participant Sign In drop-down menu.
- Off - Participants are not required to log in to the test.
- Required (Default to previous User ID on card) - Participants log in with the current User ID stored in the clicker.
- Required (Clear previous User ID on card) - Participants are required to enter their User ID into the clicker before logging in.
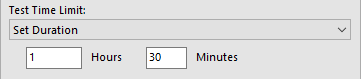
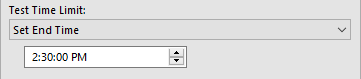
- Select a test time from the Test Time Limit drop-down menu.
- None - The test will have no timer and polling must be closed manually.
- Set Duration - Enter the hours and/or minutes for the length of the test. Polling will automatically close at this time.
- Set End Time - Set a specific end time for the test. Polling will automatically close at this time.
- Select a message to be sent to participants from the Completed Test Message drop-down menu.
- None - No message is displayed to participants when they finish.
- Grade (Point Total) - The participant's grade is displayed as a point total.
- Grade (Percentage) - The participant's grade is displayed as a percentage.
- Grade (Point Total and Percentage) - The participant's grade is displayed as both point total and percentage.
- Custom - A custom message of up to 24 characters is displayed.
- Optionally, select Prompt before displaying message to allow participants to determine if the completed test message is displayed.
- Optionally, select Remember Selections.
- Click OK.
- Click Start Polling.
- Provide participants with the Session ID to join the session.
- Participants may now begin the test. Once they have finished the test, participants can submit their results from the response device.
- Optionally, click Live Results to see real-time information about the test.
- Click Stop Polling once all the results have been received.
- Click Save to save the session results.
- Name the session and click Save. Session files should be stored in the default save location. If the session is saved in another location it will then need to be imported into PointSolutions Desktop.
- Close the Self-Paced Polling window to return to the PointSolutions Dashboard.
Classroom Receiver Channels
By default, PointSolutions clicker devices connect to "Channel 41". A specific channel is assigned to each room to prevent interference with PointSolutions clickers in use in other classrooms. Instructors must change the default channel setting in their PointSolutions application to the designated room channel before starting a clicker session. Students must also change the channel setting on their clicker device to the same channel the instructor's receiver uses in that classroom. Instructors should communicate the channel number to students before students begin responding.
Remote Student Participation
PointSolutions can also be used even with online courses. This requires students to have a device that is connected to the web (laptop, desktop, mobile) and not a clicker. There are a couple of things you need to know when using PointSolutions in this setting.
- First, you need to make sure your location-based settings are turned off. if you haven’t turned them on then you don’t need to worry about it. This is a setting that some instructors use to enhance their learning experience, and just a reminder for those instructors to turn it off.
- Second, once you open the session make sure you inform the students of the session ID, this is important because they need that ID to be able to answer the questions and receive their points.
- Finally, make sure that when setting up your questions you allow the question to be viewed on the devices, by default the students should be able to see the question. This again is for those instructors that have changed the setting to enhance their classroom experience.
For further information, below are a few links that might assist you: