Overview
This article provides a quick overview of the various Ditto digital signage components and how to add/edit content on your digital displays.
Background
NEOMED utilizes Ditto for screen mirroring around campus in conference rooms and lecture spaces. In addition to screen mirroring, our Ditto subscription offers the ability to display digital signage (both pictures and video).
Our Digital Signage is facilitated via Apple TVs connected to each university display. For displays on campus (excluding the NEW Center), Apple TV remotes are attached to the rear of each display for troubleshooting purposes (see Troubleshooting below).
- The Ditto Account Portal is web-based portal where you can upload and make changes to your digital signage lists and items.
- Items are the signage assets that you create or upload in the Ditto Account Portal.
- Lists are where these items live and are assigned to various displays on campus. Your signage items must belong to a list.
How to Access Your Ditto Digital Signage List
- Log in to the Ditto Account Portal (https://account.goditto.com)
- NOTE: You will need to be connected to the on-campus network or connected to the VPN to log in.
- Click the Signage tab on the left-hand side.
- Click Lists
- Click the List you need to edit.
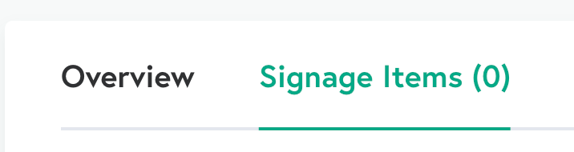
- Click Signage Items to see your existing signage items (content).
How to Upload or Create Content for your List
You can either select Upload Media or New Item to add content to your List.

Uploading Media
Upload Media is helpful when you need to upload Media items in bulk. You can upload up to 100 Media items with Upload Media.
Supported file types and restrictions
- Uploaded files may not be larger than 300MB.
- You may upload the following file types:
Steps to Upload
- Select Upload Media.
- Add your media. You can drag and drop a file into the box or browse your computer to select the file you want.
- Click Upload Items. Your media items will be uploaded to your list.
- Once your signage item(s) is/are created, you can make further adjustments to how the content will be displayed (i.e. duration, scheduled setting, order of display).
- Once configured, select Save Signage.
- IMPORTANT: If you do not select Save Signage, your items will not be saved to your list and will not display on your signage.
- Success! Your Digital Signage items will start displaying on the displays assigned to your list.
New Item
New Item is helpful when you would like to build content off of a built-in Ditto template or would like to include other content (i.e. YouTube video, Weather). When adding a new item, you’ll also see the “Media” option (this is the same as the Upload Media function above).
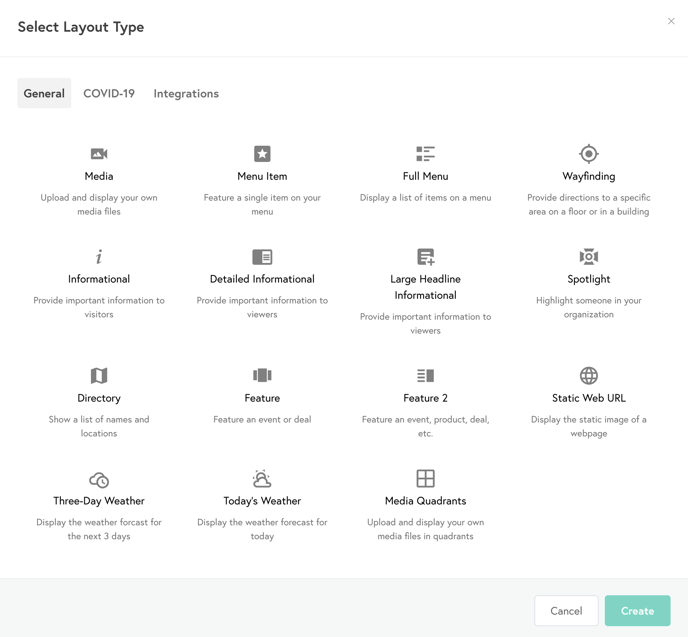
- Select New Item
- Choose from one of the provided templates or upload custom content with the Media option.
- Once you select a template, you will be directed to a page to further customize the corresponding text, picture(s) and other elements of the template. As you make changes to the template, you will see those changes reflected in the preview at the top of the web page.
- NOTE: Some templates require you to Save Item first to then see the preview. The template will communicate this if applicable.
- Once your signage item(s) is/are created, you can make further adjustments to how the content will be displayed (i.e. duration, scheduled setting, order of display).
- Once configured, select Save Signage.
- IMPORTANT: If you do not select Save Signage, your items will not be saved to your list and will not display on your signage.
- Success! Your Digital Signage items will start displaying on the displays assigned to your list.
Scheduling and Organizing Digital Signage Items
It’s possible to have numerous signage items on each list! In addition to organizing these items, you can easily set the on-screen duration time for each item and schedule items.
How to arrange the order of digital signage items in a list
- Within the Signage Items section, hover your cursor over the drag icon of an item. Your cursor will change to a hand pointer.
- Click and drag the signage item to rearrange its order in the list.
- Click Save List.
Your signage items have now been rearranged.
How to set the duration of digital signage Items
You can set the amount of time a digital signage item will play. Follow these steps:
- Within the Signage Items section of the list containing the items you would like to edit, click the horizontal three-dots icon next to your item.
- Select Duration.
- Select the number of hours, minutes, and seconds you would like the item to play for.
- If the scheduled time for multiple items in a list is the same, each Item will play for its designated duration, starting in the order the items are arranged in the list. These items will run on a loop during the scheduled time.
- Click Save List.
The duration of your signage items has now been set.
How to schedule digital signage Items
- Within the Signage Items section of the list containing the items you would like to edit, click the horizontal three-dots icon next to your item.
- Select Schedule.
- Toggle the Scheduled slider. This will enable Date, Times, and Day options that you can toggle on to schedule. In most cases, utilizing the Date option will be most appropriate.
- Date: This will allow you to select a Start Date and End Date in which the Item will appear on your Display (i.e. show this content from June 1 through June 30). After the End Date, while the Item will still be on your list, it will not display on your signage.
- Time: This will allow you to select a Start Time and End Time in which the Item will appear on your Display (i.e. show this content from 12:00 pm - 5:00 pm).
- Day: This will allow you to select days in which the Item will appear on your Display (i.e. show this content Monday, Wednesday, and Friday).
- Once configured, select Save.
- Click Save List.
Your signage items have now been scheduled.
IMPORTANT: Be careful scheduling items! If all of your items are scheduled and that date/time/day passes, your signage will be a black screen. This is because there is no active items for display.
Signage Alerts
Ditto allows you to send custom or automated alerts to your displays. This will be managed by IT and Public Safety.
Troubleshooting
Issue: The display is on, but the screen is black/blue/no signal.
- Solution: The Apple TV could be off
- Ensure TV is powered on.
- Please locate Apple TV remote behind display and remove from velcro.
- Press power button on top corner of remote.
- Wait and the Apple TV menu should then appear.
- Use Apple TV remote to navigate down to the bottom of the apps to the green Ditto app.
- Press the circular pad button on the Apple TV remote to launch Ditto.
- Your signage should then appear.
Issue: The display is on, but the screen is black and has a ? in the middle of the screen.
- Solution: No active content is scheduled to display on your list.
- You will need to check the Scheduled items on your list to ensure items are configured properly.
- Once changes are made and Save Signage is selected, you should see content appear on the display within 1-3 minutes.
Issue: The display is on, and you are seeing a menu of items and a picture banner at the top of the screen.
- Solution: There was a power outage or Apple TV update and are on the main menu of the Apple TV.
- Please locate Apple TV remote behind display and remove from velcro.
- Use Apple TV remote to navigate down to the bottom of the apps to the green Ditto app.
- Press the circular pad button on the Apple TV remote to launch Ditto.
- Your signage should then appear.
Additional Help Needed?
To learn more about Ditto digital signage, view Ditto's complete list of step-by-step guides.
You can also create a Service Request for a IT team member to assist you.